A well-structured action plan and evaluating each phase of the renovation can prevent missteps and help determine the optimal approach. To ascertain the starting point of the apartment renovation, it’s important to analyze its current condition. At times, only superficial modifications are required to rejuvenate the apartment and make it welcoming again. It’s critical to delve into each operation in detail, particularly if you intend to do the repairs yourself. If you’re not confident about your skills or wish to save time, the best course of action could be to rely on experts. This way, you’ll get a precise plan and high-standard work accomplished in a shorter timeframe.
Cosmetic or major apartment renovation
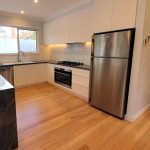
A cosmetic apartment renovation is considered a lighter option. This involves replacing the decorative finishes of some elements or several rooms at once. It implies the updating of spaces without affecting the structural elements, specifically: removing and replacing the old floor covering, adjusting the surfaces of walls, and ceiling. In this case, the execution of the work will not take too much time and will not require significant financial investments. However, the final cost will directly depend on the finishing materials you choose, for example, whether you’ll use wallpaper or paint, parquet or laminate.
A major apartment renovation implies a large-scale and labor-intensive process, which will require more significant financial expenditure. This type of renovation suggests a complete reconstruction of the apartment with the possibility of rearrangement. During the work, all window and door structures, engineering communications, and ceiling, wall, and floor coverings are replaced. A major apartment renovation can also be referred to as a “renovation from scratch”. This type of renovation is most often carried out in new buildings and includes the following stages:
- Detailed measurement of rooms;
- Apartment rearrangement;
- Dismantling work;
- Construction of partitions;
- Plastering of walls;
- Wall finishing;
- Floor screed;
- Floor finishing;
- Ceiling installation.
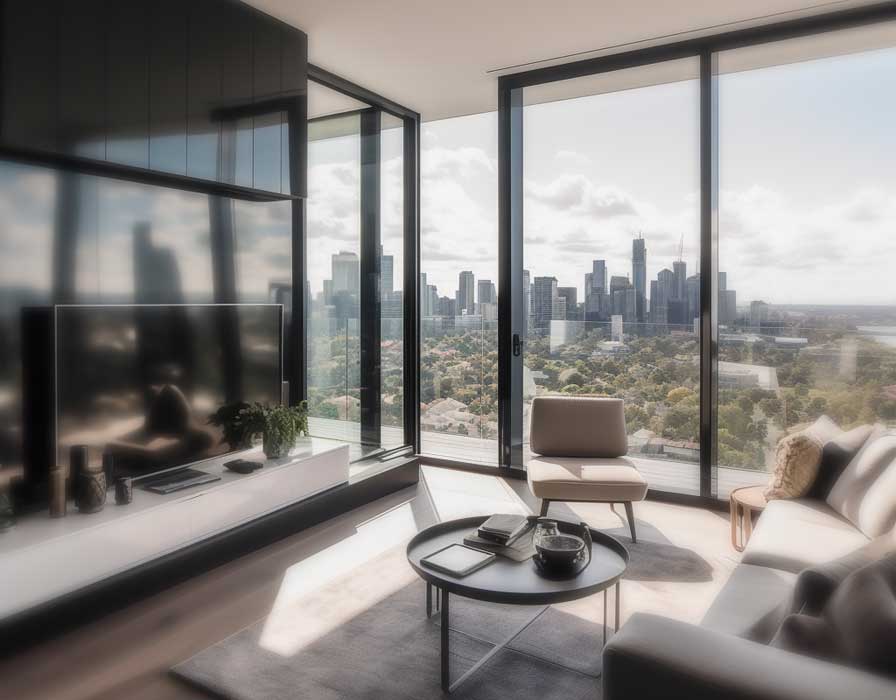
Think about design and layout
Decide right from the beginning what you want to see in your apartment – its design, placement of furniture. Decide where you want the space to be zoned and where you want light partitions. To make sure you don’t forget anything, write down your ideas on paper or on a spreadsheet. Think about your long-hidden wishes: when else can you do it, if not now? It could be replacing old windows, installing flooring, redecorating.
Decide what you’re not ready to do without. It is often from such fundamental desires that thoughts about arranging furniture and other details emerge. For example, the decision to turn a wide window sill into a seating area could entail a redesign of the kitchen set. Correct the points you have written out by comparing them with what is possible.
Renovation with a building contractor or do it yourself
Regardless of the type of renovation you have planned, you can either do it yourself or hire professionals. You can also hire local tradesmen to do only certain types of work.
If you are considering doing it yourself, it is worth reading the instructions and workshops in detail. They will help you to sequence the work in the right way and achieve the same results as an experienced tradesman.
A contractor is considered a more reliable solution, but there are pitfalls to be encountered. Be sure to draw up a contract before you carry out the work. It should be spelled out a clear timeline for the work, the responsibilities of the parties, the order of acceptance, payment, etc. Without drawing up a contract, and relying only on oral agreements, you are at great risk. A good renovation company takes its reputation seriously and bears responsibility for the work done, as well as giving guarantees. Therefore, before you decide to cooperate, do your research and look at the renovation portfolio.
The cost and budget of apartment renovating
First of all, you have to decide for yourself what level of finish you want to have after the renovation of the apartment. How much will the chosen work cost and whether there is enough budget, what you can save on, and what is better not to stingy – all these questions will become clear after choosing the type of repair: cosmetic or major repairs.
At the planning stage, you will need an estimate for the renovation. In case you are relying only on your own strength, you can use an online calculator to draw up an estimate. For calculations, prepare accurate floor areas, heights, and wall areas, taking into account deductions for openings. If difficulties arise when calculating complex wall surfaces, it is worth dividing them into simple geometric shapes: triangles, squares, rectangles, circles. Calculate the areas of the shapes first, and then add or subtract.
If you decide to use the services of contractors, they will create the estimate. But before making it, you need to have a measurement plan and all the repairs and materials you want to make clearly formed on paper. It is also best to divide the total area of the apartment into rooms: entrance hall, kitchen, bathroom, living room, bedroom, etc. All this should be prepared in order to avoid misunderstandings between you and the contractor.
The finished estimate should detail the type of work, the scope of work, the technology for doing the work, the quality category, the stages and timing, the type and quantity of construction materials, the price of the work and the payment schedule. The more detailed the estimate disclosed by the contractor, the more guarantees that you are dealing with a true professional.
Saving money is often an issue when carrying out repairs. There is nothing wrong with that, but the savings should not be to the detriment of quality and safety. In order not to pay twice, here are some tips on what you should definitely not skimp on:
- The electrical wiring should be up-to-date; if aluminium wires from a previous era are present, replace them with copper wires;
- Plumbing and plumbing of dubious quality tends to leak at the most inopportune moment;
- Windows and doors. Windows can be either wooden or plastic, equally highly insulating, but here you need to pay attention to the hardware. Install a high quality entrance door;
- The finishing materials, e.g. bad plaster will quickly crack and fall off;
- Don’t take on jobs that require skill and that you haven’t done before. Contact an expert in apartment renovation.
The choice of materials
The choice of materials depends largely on the renovation budget. But in each case, the functionality of the room should be considered. For example, a washable paint is best for the kitchen and a more environmentally friendly paint for the bedroom. More expensive latex paint is needed for bathrooms, but a simple interior paint is sufficient for living rooms.
You can find expert advice in specialist shops to help you sort out the details. It’s a good idea to calculate the materials in advance so that you don’t have to buy extra, perhaps shopping around a few times. Experts advise to take materials with a 10% reserve of the total amount.
As a rule, it is sufficient to know the basic dimensions of the room – the length of each wall and the height of the ceiling – for the calculation. Delivering every time tiles, wallpaper and paint in a flat, especially if it is small, is inconvenient, so it is wise to schedule the delivery of materials. If something needs to be brought from far away – from another region or even another country – make an order in advance.
Apartment renovation plan
Usually the renovation begins with the most difficult and dirty work: removing old finishes, erecting or moving walls, replacing windows and window sills, pipes, wiring, etc. After the remodelling and engineering work, the bathroom is tiled, then the kitchen, living room and bedrooms, corridors, pantry or cloakroom and balcony.
Do not combine renovation tasks with decorative ones: the latter demand at least some degree of tidiness. Applying paint to walls in an environment laden with construction dust isn’t optimal. A renovation plan includes a design project. This project should reflect all the drawings and basic nuances that you would like to see after the renovation is finished. It includes a general layout of all the rooms of the flat, the location of lighting, switches, outlets and the like. To correctly calculate finishing materials, appliances, furniture and decorations, as well as construction and finishing work, you should have a plan of the flat, which shows all the areas of the premises, the location of window and door openings.
Choosing a contractor
While painting the living room walls yourself may be possible, tearing down the walls and installing new ones is a complicated task. So the next step is to choose a contractor. It is cheaper to hire a contractor without a contract, but it is worth looking for a reliable contractor. It is better to choose one that works in stages just in case you suddenly decide to change contractors. While you are doing the work, it is a good idea to visit the property at least once a week, provide all the necessary materials and ensure that the work is being done in good faith: on time and according to all your wishes.
Beginning the work
The renovation process is divided into several phases, each typically lasting around a month: stripping, engineering, and finishing tasks. The stripping is the initial stage of the renovation and tends to take the most time. During this stripping phase, walls are dismantled and erected, and floors are cast.
Now for the step-by-step instructions for the renovation and construction work in the flat:
Detailed measurements.
The measurements give you a good idea of the technical parameters of the space. Without measurements, you can not avoid mistakes in the implementation of the design project.
Dismantling works.
This stage is relevant for both the secondary fund, and for new buildings. For the secondary fund at this stage should remove all flooring, ceiling, wall coverings, as well as windows, doors, switches, outlets, sanitary equipment. If redevelopment is planned, demolition of the necessary partition walls is carried out now.
Construction of walls.
Here the necessary partitions and walls are erected according to the design project.
Electrical installation.
At this stage, decide on the manufacturer and series of switches and sockets. Do not forget about laying the cable for TV and Internet.
Routing under the air conditioner.
The next step is to lay the wiring and freon pipes (trunk lines) and to install the outdoor unit. The indoor unit is not mounted at this stage.
Install water, sewer and heating pipes.
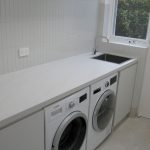
New utilities are laid according to the plan of arrangement: a washing machine, sanitary equipment and a towel dryer. Old radiators must be removed and temporary stopping plugs must be put in place, hanging new radiators at this stage should be postponed.
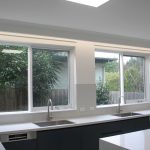
Installation of window units.
When installing the window units, do not remove the protective film until the rough finishing work is completed so as not to spoil the look of the window unit beforehand.
Installing the front door.
When installing the front door, do not install the interior lining on the flat side until the renovation is complete. It is also advisable to protect the door additionally.
Leveling the walls and ceilings.
The first step in the levelling process should be the ceiling. This involves plastering work, but if it is planned to stretch or GFB ceiling, in that case it is installed at the very end. Second in the sequence of repairs – the walls, and then soffits and openings.
Floor screed.
Screed on the cement-sand mortar setting within 24 hours, and screed on the plaster has 4 hours. In this case, you can lay the following coatings on the gypsum screed after 3 days, while the cement-sand screed can be put on after 2 weeks only. The choice is yours.
Mounting the underfloor heating.
Only to be installed on a level surface. The order of installation before or after the screed depends on the type of floor heating technology used.
Installation of ducts and ceilings made of gypsum plasterboard, fasteners for suspended furniture, installation of revision hatches.
Laying of tiles.
Tiles should be laid first on the walls and then on the floor. The bathtub must be installed before tiling to ensure a perfect joint.
Finish the ceiling.
Only paint a level surface.
Finish wall covering.
If you choose to wallpaper your walls, start from a window. Also, to avoid their deformation, do not open windows for a week after gluing.
Radiator installation.
Radiators are installed after the walls are finished. Otherwise, you won’t be able to paint the space behind them.
Installing the floor covering.
It is necessary to lay the flooring only on the absolutely dried up screed, otherwise its flaking may occur.
Stretch ceiling installation.
When installing the stretch ceiling construction, do not forget to install the lighting fixtures.
Plumbing installation.
Installing the shower, toilet, washbasin, faucet, washing machine (if you plan to place it in the bathroom).
Installing interior doors and installing skirting boards.
Installing the skirting boards should be carried out after the interior doors have been installed.
Arrangement of furniture and household appliances.
Furniture units, worktops, cooker, dishwasher, extractor fan, sink and washing machine are installed.
Installation of indoor air conditioning unit, curtain rods, installation of light fittings, socket outlets and switches.
Installation of exterior parts of switches and sockets, hanging all necessary lights and electric rings.
General cleaning of the premises.
After a completed restoration, there is still a lot of construction waste, which must be taken to a special landfill. In addition to rubbish, all contamination must be removed. Only in a clean flat, you can arrange furniture and invite guests to the housewarming party.
Arrangement of furniture and decoration.
The most pleasant moment when the renovation is finished, because the furniture and decorations will finally give the final shape to your planned interior.
Finishing work
The completion work is the last phase of the renovation – applying finishing materials to the floor and walls, fitting interior doors. This stage involves painting and tiling, laying hardwood or parquet floors, installing wallpaper, laminate, carpeting, and other types of coverings. If you opt for wallpaper as your wall decor, ensure to prime the walls at least a day before.
Bear in mind that the apartment needs to be impeccably tidy and draft-free when putting up wallpaper. Exercise caution when trying out wall tiles. Take into account the height of furniture and bathroom installations, particularly in the restroom. Now you can say that your renovation is complete. All that remains is to fill the flat with contents. In addition to installing the furniture, this stage includes the installation of lighting, electrical fittings, skirting boards and curtain rails.
Everyone wants to organise their space as comfortably and stylishly as possible, so that it reflects their inner world. An interior is built to last for at least a few years and there is a lot of investment involved, so ask a professional to help you allocate your budget and renovate it properly.