Let’s face it—bathroom renovations can be expensive, especially in a city like Melbourne where labor costs can skyrocket. But what if I told you that you could achieve a stunning bathroom makeover without breaking the bank? The secret? Doing it yourself! DIY bathroom renovations are not only cost-effective but also incredibly rewarding. Whether you are an owner-builder or just someone looking to save some cash, this guide will walk you through everything you need to know to tackle a cheap bathroom renovation like a pro.
- Planning Your Renovation: Budgeting and Design
- Essential Tools and Materials for DIY Bathroom Renovations
- Step-by-Step Renovation Process
- Building Permissions and Regulations in Melbourne
- Hiring Professionals When Needed
- Saving Money with DIY Bathroom Renovations
Planning Your Renovation: Budgeting and Design
Before you grab your tools, it’s crucial to plan your renovation meticulously. Start by setting a realistic budget. How much are you willing to spend on materials, tools, and any professional help you might need? Once you’ve got your budget sorted, it’s time to think about design. What’s your vision for the space? Are you going for a modern, minimalist look or something more traditional? Sketch out your ideas and make a list of the materials you’ll need—tiles, plaster, waterproofing materials, and so on. Remember, the more detailed your plan, the smoother the renovation process will be.
Essential Tools and Materials for DIY Bathroom Renovations
Now that you’ve got your plan, let’s talk tools. Here’s a quick list of essentials you’ll need:
- Demolition Tools: Hammer, crowbar, and safety gear (gloves, goggles, etc.)
- Waterproofing Materials: Waterproof membrane, sealant, and a good-quality brush
- Tiling Tools: Tile cutter, spacers, adhesive, and grout
- Plumbing and Electrical Tools: Wrench, pipe cutter, wire stripper, and voltage tester
- Plastering and Painting Supplies: Plaster, trowel, sandpaper, primer, and paint
Having the right tools on hand will save you time and frustration down the line.
Step-by-Step Renovation Process
Alright, let’s get into the nitty-gritty of the renovation process. Follow these steps to transform your bathroom without spending a fortune.
Demolition and Removal
First things first—clear out the old to make way for the new. Start by removing old tiles, fixtures, and any outdated elements. Be careful with plumbing and electrical connections; you do not want to cause any damage that could lead to costly repairs. Once everything’s cleared out, give the space a good clean. This will make the next steps much easier.
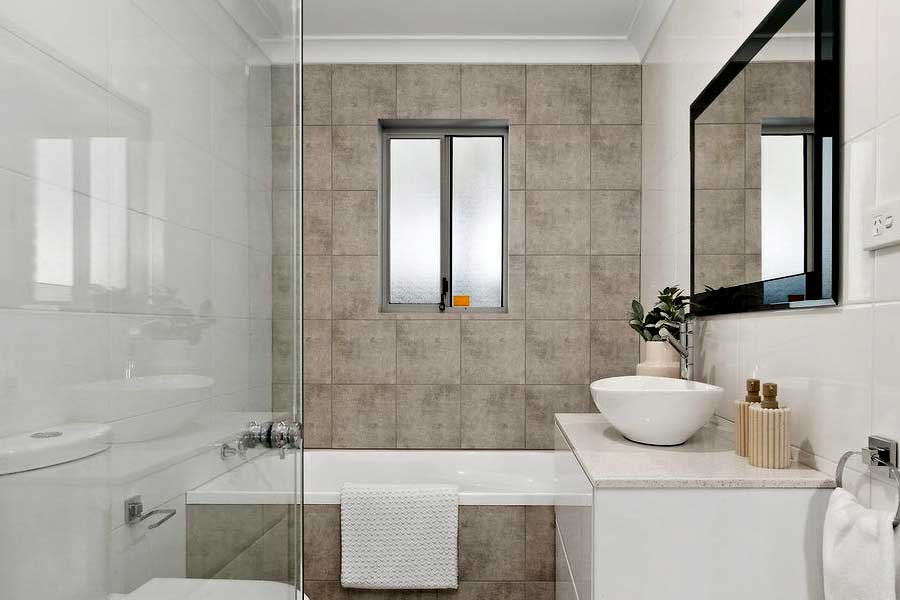
Waterproofing and Tiling
Waterproofing is a critical step in any bathroom renovation. You don’t want water seeping into your walls and causing damage down the line. Apply a waterproof membrane to the walls and floor, paying special attention to corners and edges. Once that’s done, it’s time to tile. Start with the walls, then move on to the floor. Use spacers to ensure even gaps between tiles, and don’t forget to let the adhesive dry completely before applying grout.
Plumbing and Electrical Work
If you’re comfortable with basic plumbing and electrical work, you can tackle these tasks yourself. However, if you’re unsure, it’s best to call in a professional plumber or electrician. After all, you don’t want to risk a leaky pipe or a faulty wiring job. Once everything’s in place, test the plumbing and electrical systems to make sure they’re working correctly.
Plastering and Painting
With the heavy lifting done, it’s time to add the finishing touches. Apply plaster to any uneven walls or ceilings, then sand them down for a smooth finish. Once the plaster is dry, you can start painting. Choose a color that complements your tiles and fixtures, and don’t forget to use a primer for better adhesion. A fresh coat of paint can make a world of difference in transforming your bathroom.
Building Permissions and Regulations in Melbourne
Before you start your renovation, it’s important to check if you need any building permissions. In Melbourne, certain types of bathroom renovations may require approval from your local council, especially if you’re making structural changes or altering plumbing and electrical systems. Make sure to do your research and obtain any necessary permits before you begin. This will save you from potential fines and headaches down the line.
Hiring Professionals When Needed
While DIY is great for saving money, there are times when it is best to call in the pros. If you’re not confident in your plumbing or electrical skills, it is worth hiring a licensed plumber or electrician. Similarly, if you are dealing with complex structural changes, a professional might be your best bet. Remember, the goal is to save money, not to cut corners that could lead to costly mistakes.
Saving Money with DIY Bathroom Renovations
So, there you have it—a comprehensive guide to cheap bathroom renovations that you can tackle yourself. By planning carefully, using the right tools, and knowing when to call in the pros, you can transform your bathroom without breaking the bank. Whether you’re an owner-builder or just a savvy homeowner, DIY renovations are a great way to add value to your home while keeping costs low. So, what are you waiting for? Grab your tools and get started on your dream bathroom today!